This area is very close to Tahurangi Lodge and there lies its greatest strength as a practice and beginner’s area—on mostly short climbs.
This area is very close to Tahurangi Lodge and there lies its greatest strength as a practice and beginner’s area—on mostly short climbs.
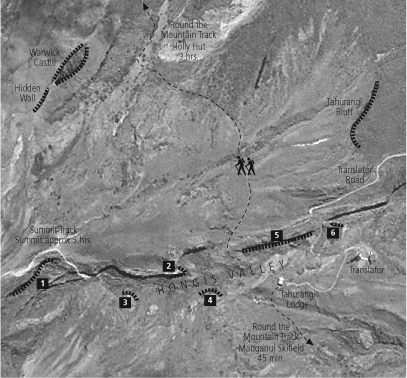
Hongis Valley is the gully which runs between Tahurangi Lodge and North Ridge. It is the route of the Summit Track. Of the crags detailed The Prow is the superior. Left and right are given looking towards the summit of the mountain.
The first set of cliffs on the south when walking up the Summit Track from Tahurangi Lodge were given a pretentious name which was edited out in the name of art, and also because no-one was bitten by a ferocious weta. Two routes have been done on Mad Dogs Wall.
Follow the Summit Track for a further 100m and on the left there is a small rather crumbly outcrop. It is called Tee Face after the prominent ‘T’ in the centre of the face. This is generally top roped as the crag is of poor quality. Descent is by climbing upwards slightly and back into Hongis. Its proximity to Tahurangi Lodge and sunny aspect make this an excellent top roping crag for beginners.
On the northern of Hongis Valley is a remarkably good area known as The Prow. Although the routes are not hard to protect, a good belay anchor at the top may be difficult to find. Descent is by climbing down to the top of The Prow, and then traversing north and down.
Continuing up the Summit Track to the long set of steps up a scoria slope. Three sets of small crags are evident, one above the other. The top most wall is Surf’s Up Wall at 1800m.
Further down valley from The Prow, opposite Tahurangi Lodge, is Spectre Wall and below the Translator Road, is Tegel Wall.
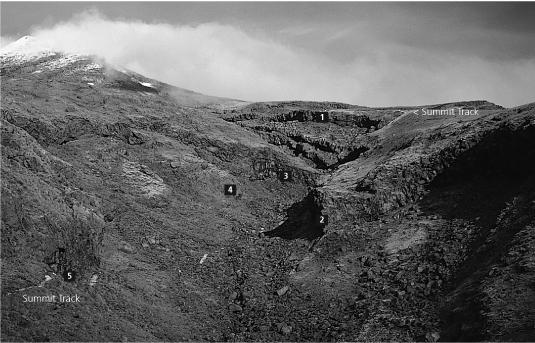
1 Surf’s Up Wall
2 The Prow
3 Hongis Neck
4 Tee Face
5 Mad Dogs Wall

