The two recognised routes on directly on the East Face exist, but the line of ascent may alter owing to changing ice conditions. Both routes are threatened by ice avalanches.
Mt Graham to Mt Tasman
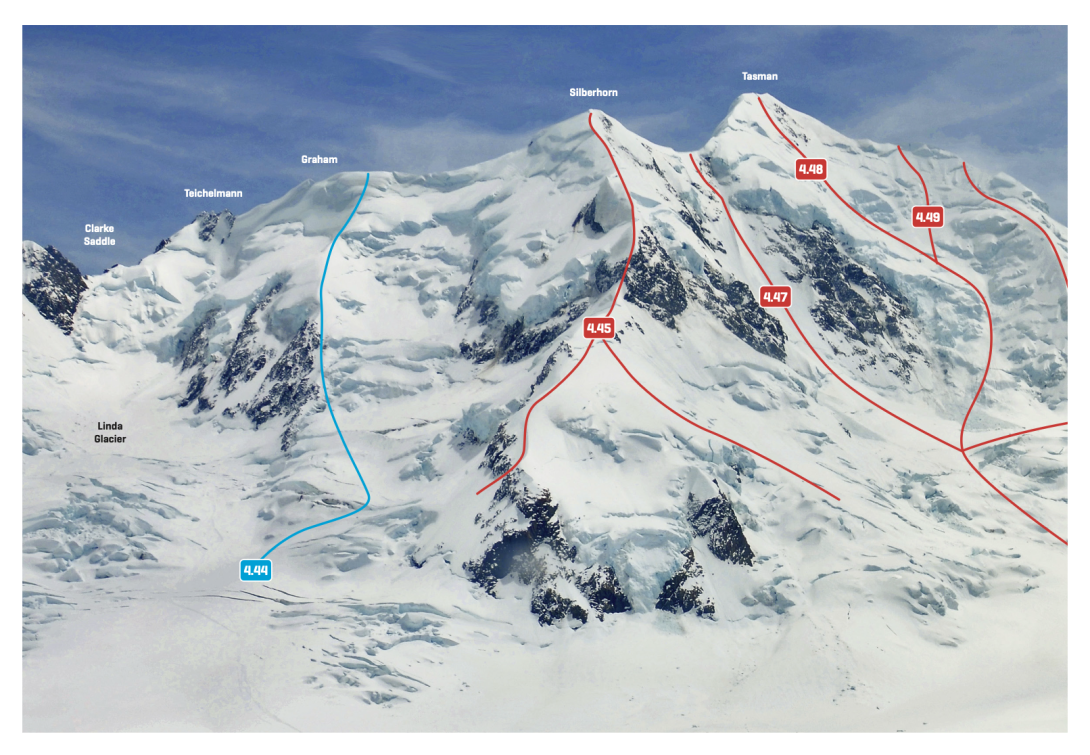
Routes
| Reference | Title | Grade | Length | Pro | Quality | Alert | Operations |
|---|---|---|---|---|---|---|---|
| 4.47 | 4.47To Silberhorn-Tasman Col, V,3+,4- | V,3+,4- | 0m | ||||
|
Up directly to the col between Silberhorn and Mt Tasman.
|
|||||||
| 4.48 | 4.48Central Route, V,3+ | V,3+ | 0m | ||||
|
Up the slopes left of Syme Ridge, then veering left to finish directly on the summit.
|
|||||||
| 4.49 | 4.49Leitner/ Von Terzi, V,3+,4 | V,3+,4 | 0m | ||||
Up the slopes left of Syme Ridge, finishing on the north shoulder. |
|||||||
| 4.50 | 4.50Syme Ridge, IV,3+,3+ | IV,3+,3+ | 0m | ||||
|
Another classic, especially when combined with Silberhorn Arête (Route 4.46) to make a traverse of Mt Tasman. Access onto the base of the ridge is via:
|
|||||||