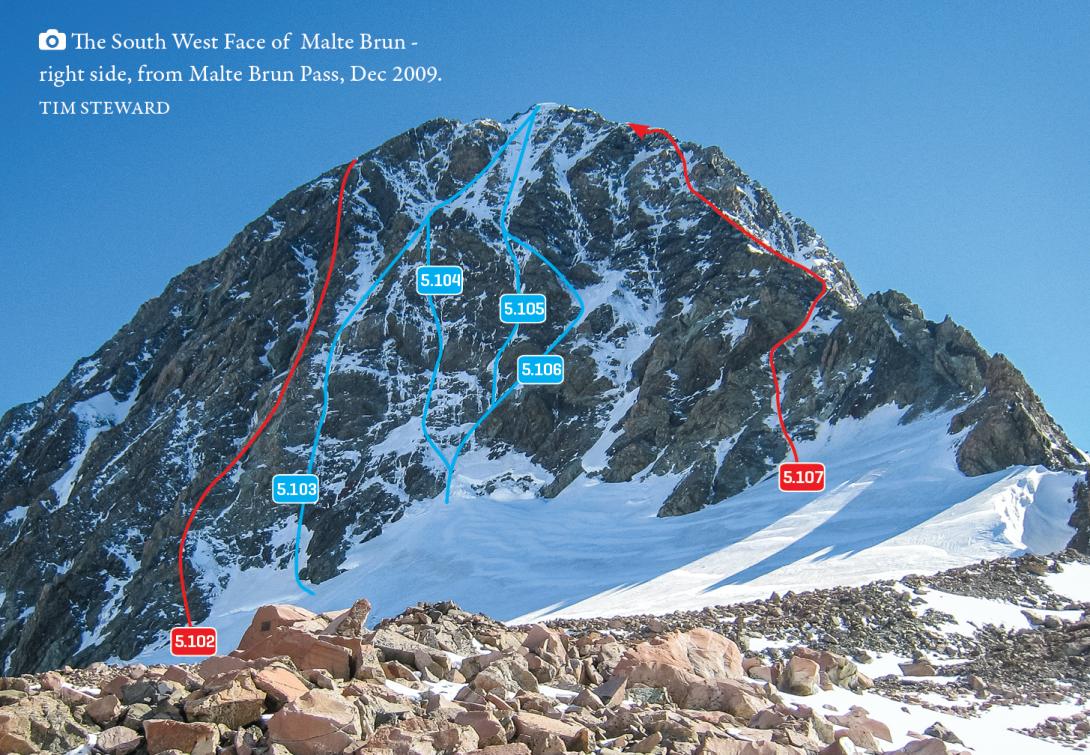
South West Face of Malte Brun – right side – from Malte Brun Pass, December 2009
Routes
| Reference | Title | Grade | Length | Pro | Quality | Alert | Operations |
|---|---|---|---|---|---|---|---|
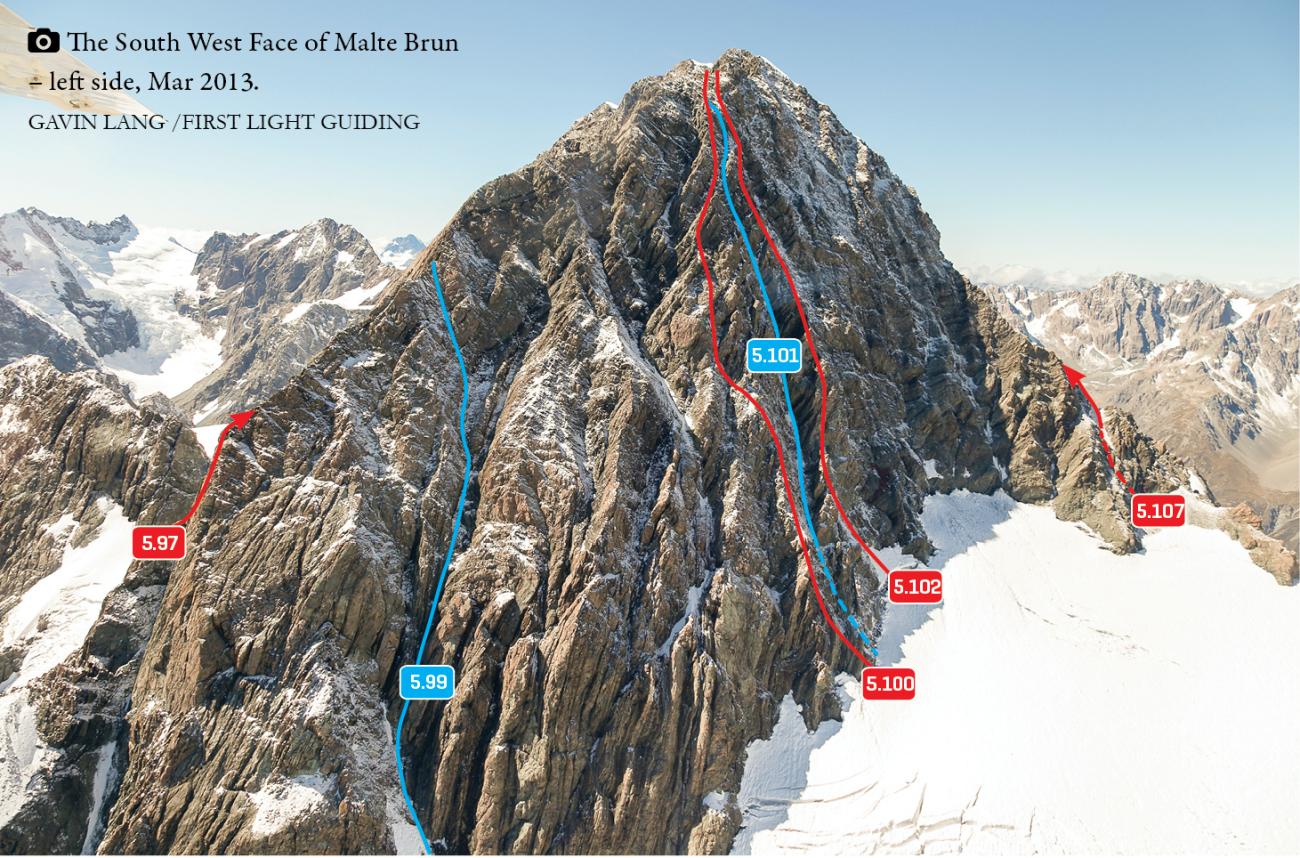
| 5.99 | 5.99Moore Gully, V,3+ | V,3+ | 0m | ||||
|
Ascend the prominent gully on the left side of the face to reach the West Ridge below the cheval.
|
|||||||
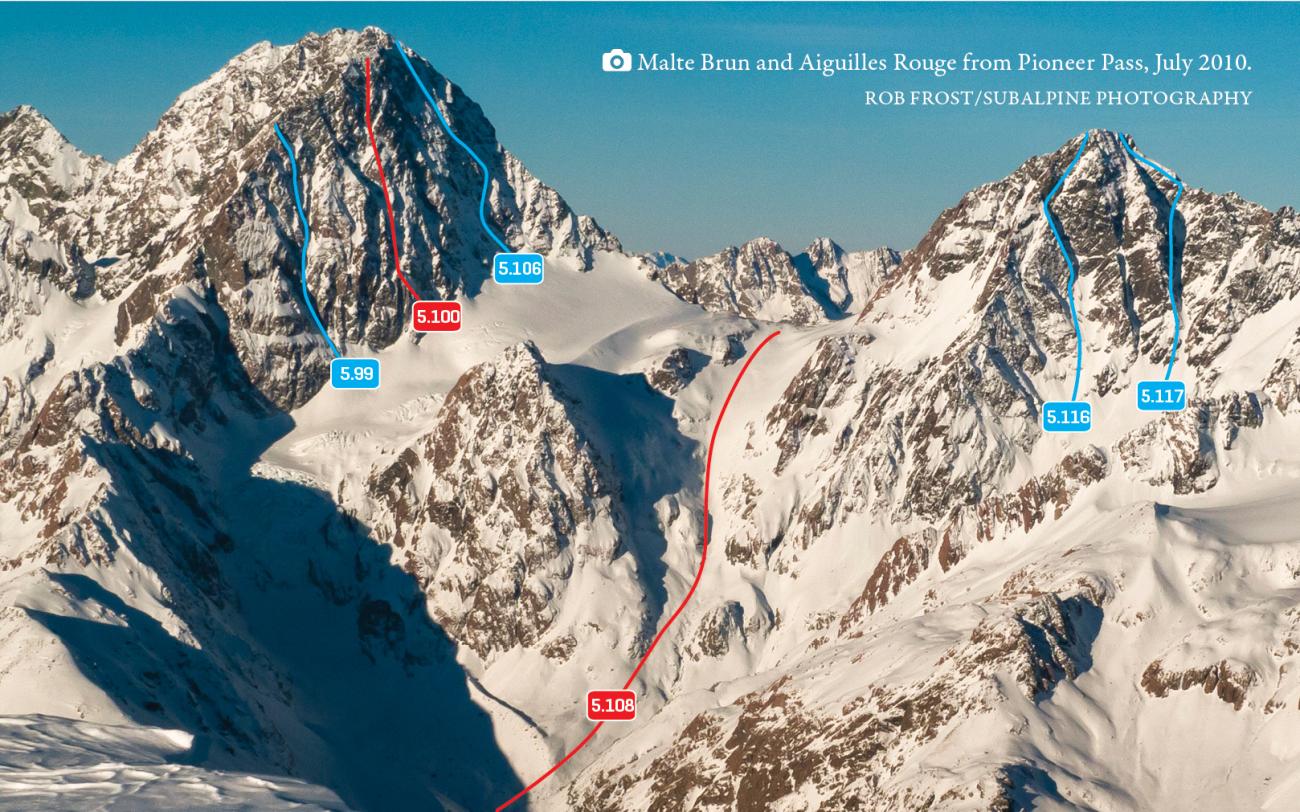
| 5.100 | 5.100Central Rib, VI,4 | VI,4 | 0m | ||||
|
From halfway up the Beetham Glacier, ascend broken spurs and ridges on the left side of the prominent central rib to join the upper West Ridge.
|
|||||||
| 5.101 | 5.101The Christmas Turkey, VI,4 | VI,4 | 0m | ||||
|
Start up a prominent couloir in the centre of the face (between two distinct arêtes), and ascend until the couloir peters out. Traverse left around a buttress then ascend gullies to the upper West Ridge.
|
|||||||
| 5.102 | 5.102Snuff, VI,5,17 | VI,5,17 | 0m | ||||
|
Climbs the distinct arete to the right of the Christmas Turkey, beginning just to the left of the ‘big red spot’ at the bottom of the face. A couple of scrambly pitches on poor rock lead to steepening ground with good rock (two crux pitches). The upper part of the route is again easier angled with poor rock. The first ascentionists climbed the route in 16 pitches.
|
|||||||
| 5.103 | 5.103Rock n Roll Part 1, V,4+ | V,4+ | 0m | ||||
|
Ascend the third prominent snow cone left of the South Ridge, then on up mixed snow and rock, with two short steep steps. After 200m, easier ground leads up rightwards towards the summit. If clear of snow and ice, the rock is not very sound.
|
|||||||
| 5.104 | 5.104Rock n Roll Part 2, V,4+ | V,4+ | 0m | ||||
|
Left of Rightside Direct. When good ice covers the ‘forgettable rock’ then this route could be worth a look, otherwise probably not.
|
|||||||
| 5.105 | 5.105Rightside Direct, V,4 | V,4 | 0m | ||||
|
Ascend the second prominent snow cone left of the South Ridge and, ignoring a ramp leading right to the Zig Zag route, ascend five steep ice pitches to reach easier-angled snow slopes leading to the summit.
|
|||||||
| 5.106 | 5.106Zig Zag, IV,4 | IV,4 | 0m | ||||
|
A classic, which is often in condition when the other ice routes on the face are not. Ascend the second prominent snow cone from the South Ridge and follow a ramp out right and into an amphitheatre. Move up left onto the crest of a buttress, then follow snowfields to the summit. The route was skied in the spring of 2017.
|
|||||||
| 5.107 | 5.107South Ridge, III,3+ | III,3+ | 0m | ||||
|
From Malte Brun Pass, skirt around the first few pinnacles on the west side of the lower ridge, then head up the crest of the ridge, which rises in two long steps. The rock is very rotten and in parts the ridge is quite exposed. Not recommended as a summer climb, but rather when it is covered with snow and ice (this doesn’t stop some people though). Probably the best way to descend if you’ve just climbed the South West Face.
|
|||||||
Images
*
*