Located above Livingston Bay, east of Evans Pass.
Routes may be longer than 25 metres! The 50m rope from the the rap anchors may not get you back to the ground. Approach from the top. Take an extra rope to rap in, and ascenders/prussicks to exit the top of the climbs to safe ground. The bottom of the crag is also steep, please exercise a bit of steep country sense.
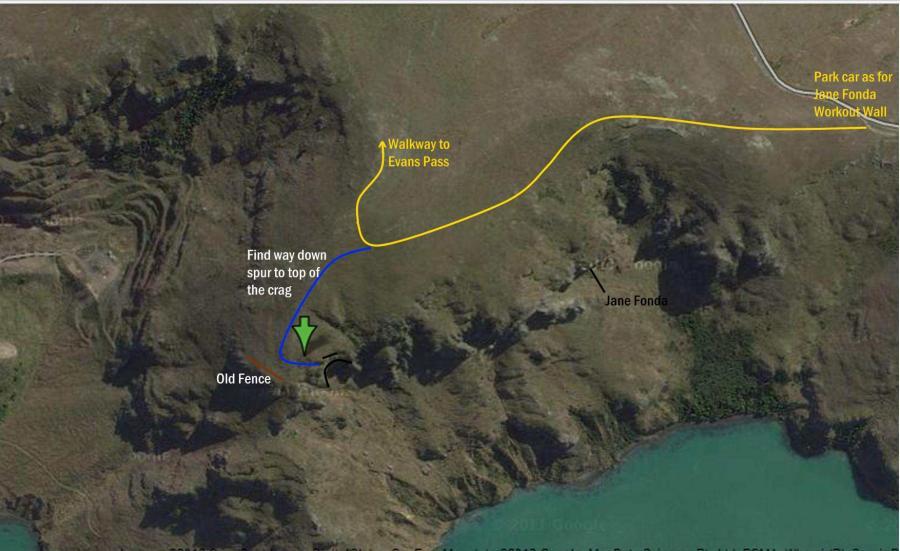
Map
Use same car park for Jane Fonda W/o Wall. Drive to Evans Pass on the Summit Road, and drive 3km towards Godley Head. Park in a layby directly above Taylor's Mistake.
Walk west along Crater Rim Walkway (towards Lyttleton).
Cross stile and contour west, to obvious hairpin bend.
At hairpin, walk straight off end of bend onto the spur and carry on to a large block.
Descend from block down the spur to a fence line, and top of gully ( with a broadleaf).
Traverse back east tending slightly downhill under a small rock buttress to a narrow grassy ledge.
At the ledge there should be some bolts to set up your rap rope & gear up.
A straight abseil will take you down a long corner, this climb is "Night Moves"
Routes
| Reference | Title | Grade | Length | Pro | Quality | Alert | Operations |
|---|---|---|---|---|---|---|---|
| CtE | CtEClose to the Edge, 20 | 20 | 20m | 4 |
|||
|
Start just left of ‘Fragile’. Start directly below the first bolt. Climb
|
|||||||
| Fragile, 20 | 20 | 20m | 4 |
||||
|
Traverse round to the right of the crag past a flax bush to the foot of wall,
|
|||||||
| RD | RDRain Dancer, 20 | 20 | 28m | 8 |
|||
|
Start Left of the yellow wall, climb wall to shrubby ledge at 12m. Step up &
|
|||||||
| SS | SSStanley Street, 20 | 20 | 25m | 5 |
|||
|
Takes a line up the left side of the buttress starting down and left of the
|
|||||||
| Gas Guzzler, 20 | 20 | 25m | 6 |
||||
|
Gas Guzzler takes a line on the right side of the buttress; start just right
|
|||||||
| NM | NMNight Moves, 18 | 18 | 25m | 6 |
|||
|
Initially climbed in the dark, a route that has everything. Start up an easy
|
|||||||
| RD | RDRising Damp, 21 | 21 | 22m | 6 |
|||
|
Starts as for ‘NM’, after the first bolt move right and into the obvious
|
|||||||
| FLF | FLFFull Length Feature, 18 | 18 | 30m | 9 |
|||
|
Start at toe of butress, climb daigonally right to foot of large prow. Climb
|
|||||||
| Looser Cruiser, 17 | 17 | 30m | 10 |
||||
|
Start as for FLF and climb diagonally right across the face as for FLF. Move
|
|||||||
| Excursion, 19 | 19 | 20m | 5 |
||||
|
Start as for “BOF” at the first bolt move left onto the arête and climb
|
|||||||
| BF | BFBridging Over Flora, 17 | 17 | 30m | 5 |
|||
|
Start as for FLF to the 6th bolt, then go round right under the nose to the
|
|||||||
| TWS | TWSThin Wall Special, 20 | 20 | 20m | 5 |
|||
|
Start just right of “BOF”, climb the wall technically until you get to
|
|||||||
| Cn | CnConundrum, 24 | 24 | 18m | 4 |
|||
|
Start at the fence directly below the first bolt. Climb the shallow corner to
|
|||||||
| HM | HMBoyzone, 22 | 22 | 20m | 6 |
|||
|
Start 2.0m left of the fence directly below the first bolt. Climb the wall to
|
|||||||
| Easterly Breeze, 16 | 16 | 20m | 5 |
||||
|
Start as for Hall Mark past the first two bolts then move left and up in to
|
|||||||
| Bz | BzHall Mark, 24 | 24 | 20m | 6 |
|||
|
Start 2.0 metres down and right of the fence line at a short right facing
|
|||||||
| Prickly Cold, 23 | 23 | 20m | 6 |
||||
|
Start as for Hall Mark past the first bolt then move right and up to the
|
|||||||
Images

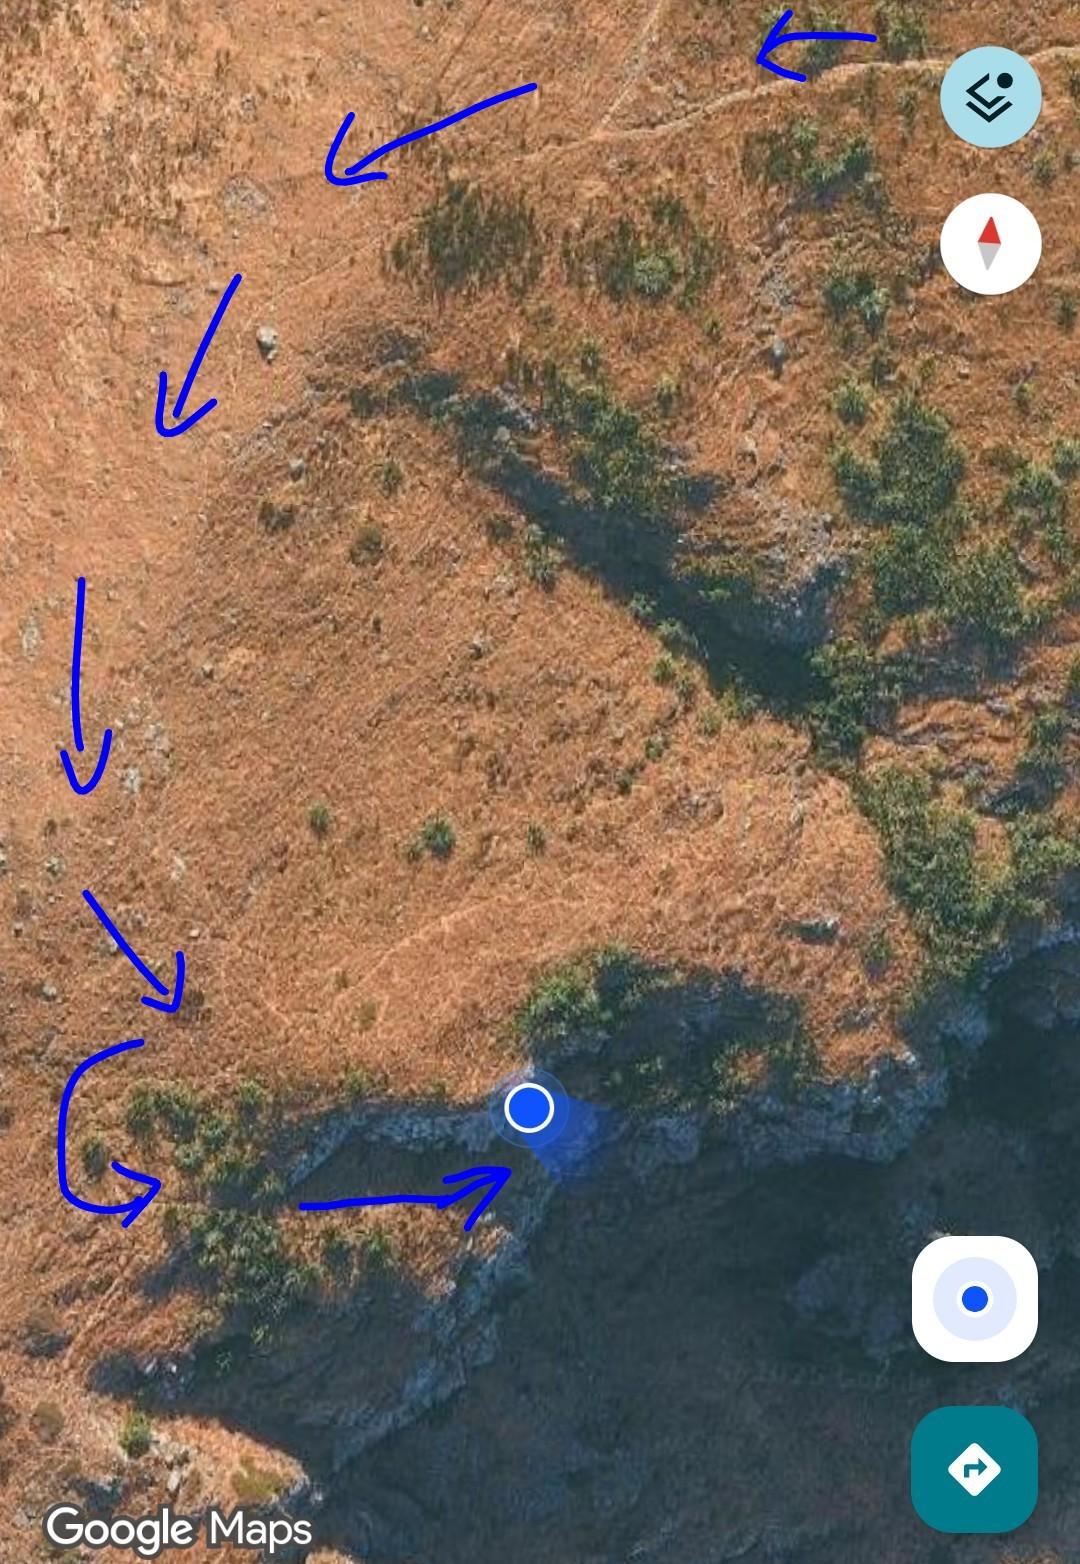
Bobby B's coordinates didn't work for us. The abseil bolts are:
NZtopo50: 1580520E 5172980N Alt:197m
Google maps: -43.595884, 172.758690
In reply to Bobby B's coordinates didn't… by samwise
Clickable link:
https://topos.nz/#lat=-43.605071&lon=172.747838&zoom=13.9&rotation=0&pi…
Here is a more accurate map pin of where to walk down to find the bolts(-43.5958681, 172.7580853)
Went and checked the hangers they are both fine, the surface rust is more tarnishing, there is no pitting or flaking
Hi nogger77, you need to get amongst it and replace them
Hangers on the two rap bolts appear to be rusted through and through
This is a great little crag. We went on a week night and only climbed three or four routes each as the approach takes about 45min by the time you abseil to the base. I felt as though most climbs were over graded by a grade or two. My thoughts on grades - Rain Dancer ***19, Gas Guzler **18 (sustained, and slightly overhanging but big holds), Night Moves *16-17.
Nice crag in a cool spot. My suggestions on grades/stars etc:
Rain Dancer: *** 18-19 Good steady route
Stanley St: 19 Bit fragile and run out
Gas Guzzler: ** 20 Nice
Rising Damp: * 21
FLF: 17
BOF: * 16
TWS ** 20 Nice
BoyZone 22 Quite brittle holds, needs traffic
Easterly Breez Quite brittle holds, needs traffic
Fully bolted!
Hard to tell, is this fully bolted, or do some routes need gear?
A fantastic crag.