Routes
| Reference | Title | Grade | Length | Pro | Quality | Alert | Operations |
|---|---|---|---|---|---|---|---|
| Red Herring, 23 | 23 | 5 |
|||||
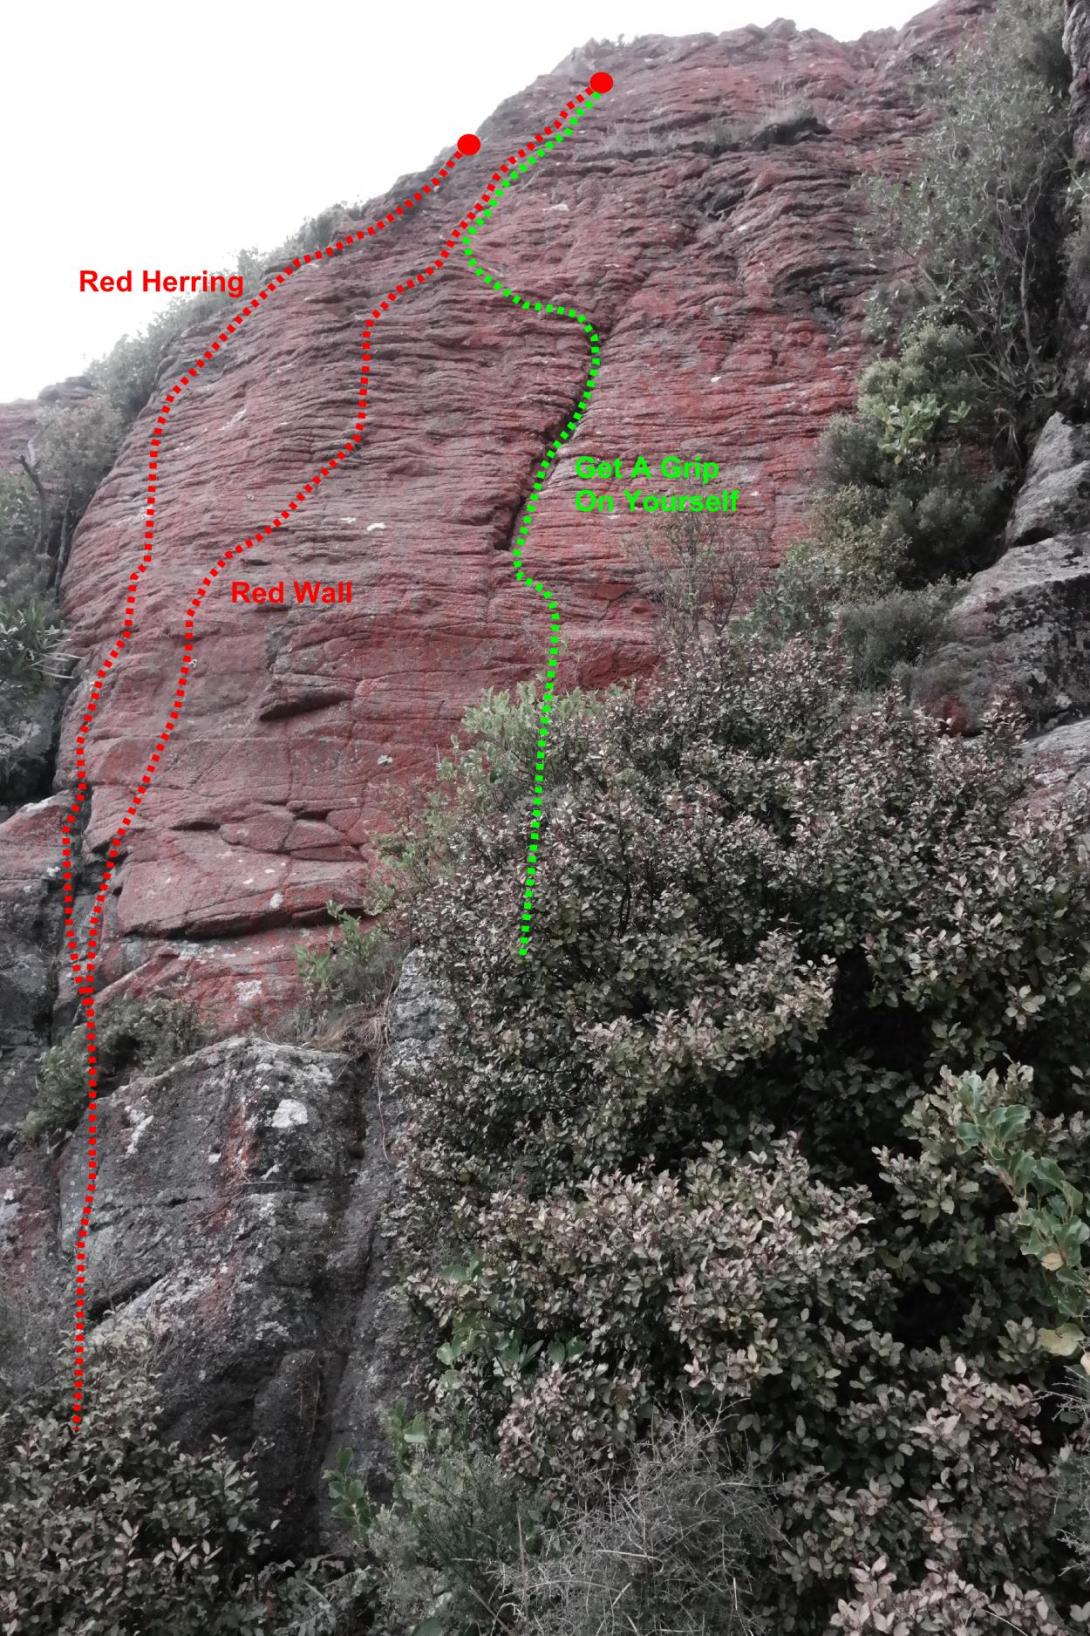
Start as for Red Wall, after B1 (new) continue straight up the edge of the buttress just in from the blunt arete |
|||||||
| RW | RWRed Wall, 24 | 24 | 4 |
||||
Takes a direct line left of Get a Grip on Yourself. Start below a scruffy crack, make a few moves up this before swinging out left onto the wall (BR), good holds enable you to clip (BR), devious but direct moves allow you to stand on the good move up awkwardly to good holds just above 3rd BR. Continue more easily up the wall past the new replacement (BR) on Get a Grip on Yourself. Step left at the top to a new double bolt belay. |
|||||||
| Get A Grip On Yourself, 21 | 21 | 15m | 1 |
||||
The crack on the Red Wall, 6m left of W. Climb the crack until it runs out, move left to a bolt which protects the scramble to the top. |
|||||||
| Red Dwarf, 22 | 22 | 15m | 5 |
||||
Hop up blocks on the right, behind the bushes, and step right onto the red slab. Some tricky climbing, especially for short people, to reach another ledge. Heading straight up past the last bolt is contrived but worth it if you've come this far. |
|||||||

The routes "Red Wall" and "Get a Grip on Yourself" are now shown accurately on the photo just added