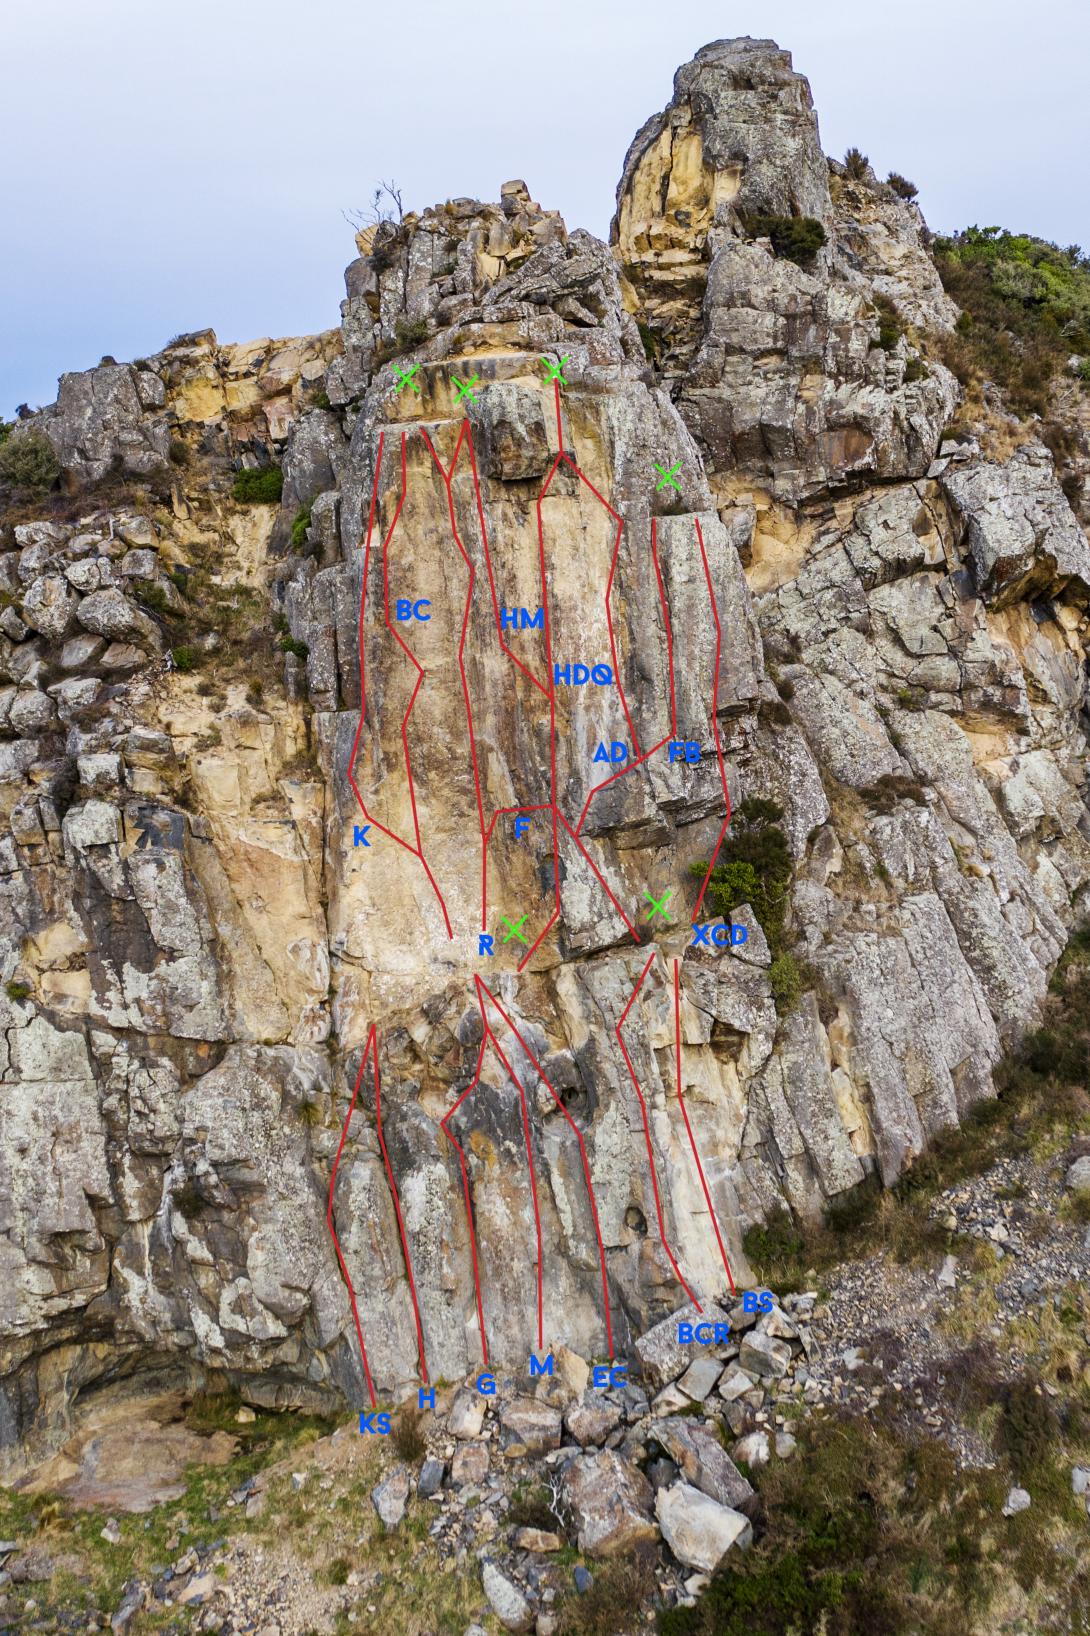
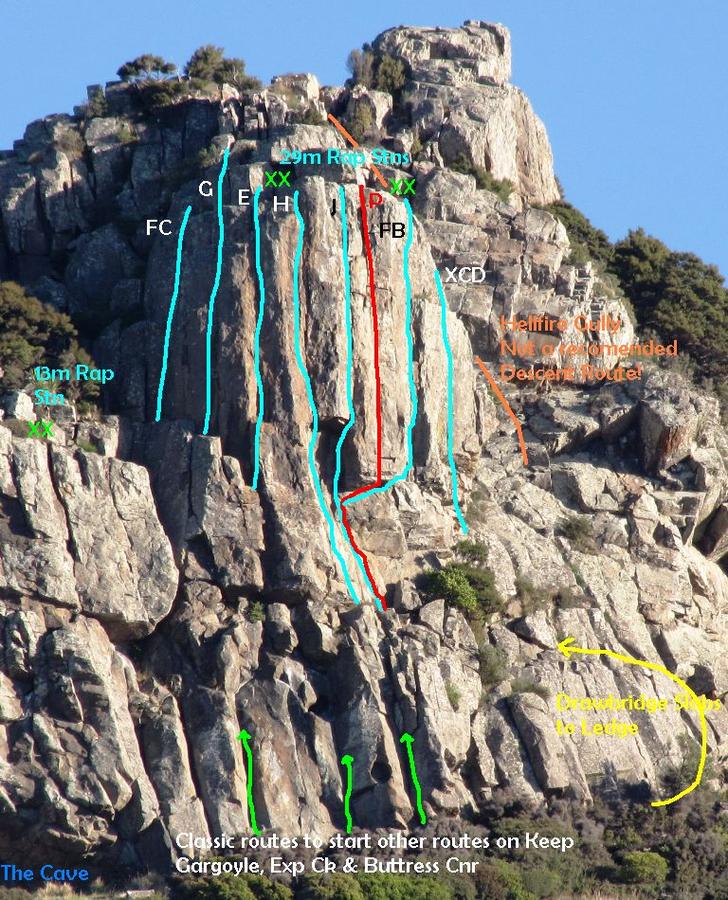
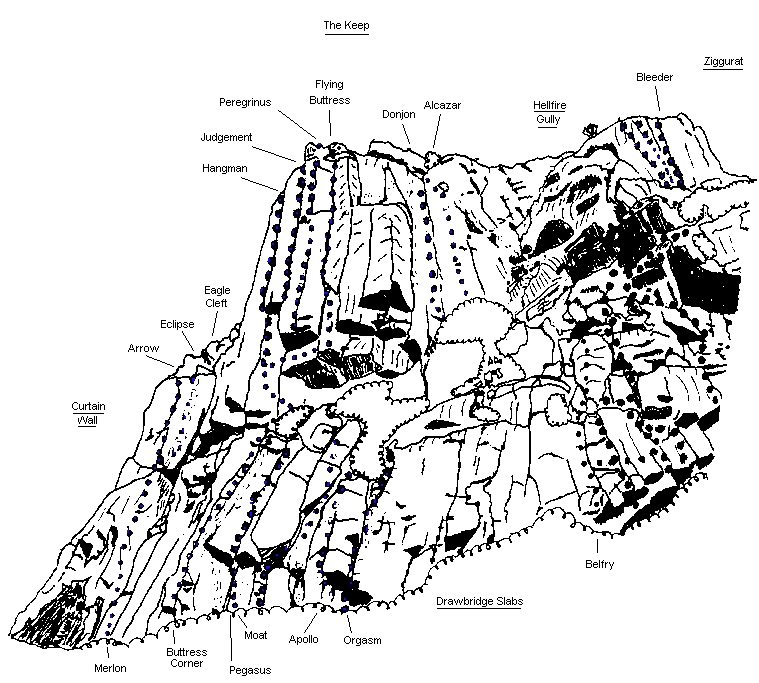
The Keep is the large steep buttress that dominates Castle Rock. Most of the routes on this wall – including some of the best climbs on the Port Hills – were destroyed in the 22 February 2011 Christchurch earthquake. New routes have been put up where the majority of rock fell away, all bolted. Double bolt belays (DBB) have been added at the top of all the new climbs as to avoid walking around the top and knocking off loose rocks. Please wear a helmet when climbing here as there are loose rocks lying about.
Routes
| Reference | Title | Grade | Length | Pro | Quality | Alert | Operations |
|---|---|---|---|---|---|---|---|
| Gothic, 15 | 15 | ||||||
Short groove on LH of Wall. minimal pro. |
|||||||
| K | KKeepless, 21 | 21 | 20m | 6 |
|||
|
Line of bolts leading up and left from the DBB on the party ledge. Goes around the arête to the slabs and then finishes at DBB at the top of Birth Canal. Can be climbed more directly and a little harder using some trad straight up the crack and then rejoining the route. Great exposure if you climb the arête to the top after the crack.
|
|||||||
| BC | BCBirth Canal, 25 | 25 | 20m | 7 |
|||
|
Start as for Keepless at DBB on the Party Ledge. Climb slab up to pedestal then with difficulty up shallow groove up to big ledge before the top. Clip bolt then move out right onto face to top out with a couple of big moves.
|
|||||||
| Rebirth, 25 | 25 | 20m | 7 |
||||
|
Start up Reincarnation. After the big move, go left and then finish up Birth Canal.
|
|||||||
| R | RReincarnation, 25 | 25 | 20m | 8 |
|||
|
Technical stemming up the main corner with a big move and then some spicy moves on crimps at the top. At the last bolt, either continue straight up or mantle onto the ledge to the right. Both recommended.
|
|||||||
| F | FFangs, 26 | 26 | 5m | 1 |
|||
|
Startup Reincarnation to 1st bolt and then traverse across right on the "Fangs" to the arête. The route finishes there but can be linked with Hang on Man.
|
|||||||
| HM | HMHang on Man, 25 | 25 | 20m | 6 |
|||
|
Can be started at either the Party Ledge on the left side or the Half Height Ledge on the right side. Climb the arête deviating to use the pedestal ledge on Hung Drawn and Quartered then moving back on to the arete climbing more on the left side to a crux at the top before reaching the ledge at the top of Reincarnation. Fantastic exposure.
|
|||||||
| HDQ | HDQHung Drawn and Quartered, 25 | 25 | 20m | 6 |
|||
|
Start at DBB on Half Height Ledge on right side of The Keep. Climb the slab to the left up onto the pedestal. Step left onto the arete and clip next bolt then move right into the groove and follow 2 bolts till under the big roof. Finish by climbing up onto the ledge to the right of big roof and then to DBB on the top. Watch for sharp edge on ledge when lowering. It has claimed one rope already. Some work has now been done to dull the edge.
|
|||||||
| AD | ADArrested Development, 25 | 25 | 20m | 6 |
|||
|
Start as for Falling Buttress at DBB. Climb slabs to left and then traverse right out above roof. Climb line of bolts up the groove in the middle of the face, finishing with a mantle onto a ledge right of the big roof.
|
|||||||
| FB | FBFalling Buttress, 21 | 21 | 20m | 7 |
|||
|
Starts at DBB on Half Height Ledge on the right side of The Keep. Climb slab up to the left of the roof and then traverse right back above the roof passing 3 bolts till you reach the farthest right line of bolts. Climb up clipping 3 more bolts and then some wires or cams to top out at DBB on a ledge.
|
|||||||
| Flying Bastard, 23 | 23 | 0m | 3 |
||||
First climb Ex Cathedra to place the first runner. Downclimb and climb directly up through the roof to join Falling Buttress. |
|||||||
| Ex Cathedra, 23 | 23 | 16m | |||||
Start beneath the layered overhangs right of Flying Buttress. Move left to a flake and CD placement. Move up on small holds to a jug and rest. Easier moves up and right to arete which is followed to top. |
|||||||
| XCD | XCDEx Cathedra Direct, 25 | 25 | 16m | ||||
Start as for Ex Cathedra, but above the roof take the formidable thin crack. Almost desperate (not the easiest 25 around). Using the left arete makes it easier. Excellent wires. |
|||||||
| The SS, 24 | 24 | 11m | 1 |
||||
The S-shaped crack right of Ex Cathedra. Technical. Move up the groove to a bolt, then up the thin crack and left to jugs and up. Pretty tecko. |
|||||||
| FC | FCFalcon Crack, 15 | 15 | 8m |
|
|||
Falcon Crack was destroyed in the 22 February 2011 Christchurch earthquake. Popular. The prominent crack above Eagle Cleft. Steep sustained climbing with plenty of large holds. An optional extra is the boulder finish at the top. |
|||||||
| G | GGibbet, 18 | 18 | 12m |
|
|||
Gibbet was destroyed in the 22 February 2011 Christchurch earthquake. The groove line R of Falcon Crack. A thoughtful start leads to jugs. Sustained. Some pro. The first ascent was by mistake – it was assumed to be the finish to Gargoyle. The route can be extended by starting down in the Aviary and working your way up the crack in the right wall of Eagle Cleft until it joins the rest of Gibbet. Worthwhile. |
|||||||
| E | EExecutioner, 19 | 19 | 15m |
|
|||
Executioner was destroyed in the 22 February 2011 Christchurch earthquake. From the belay ledge on Gargoyle climb R onto the pedestal then up the thin crack R of Gibbet, mostly on good holds and occasional locks. There's one difficult bit in the middle and some wobbly holds at the top. Excellent pro but it takes strength to put lots in (especially at the top) – short but quite sustained. |
|||||||
| H | HHangman, 17 | 17 | 16m |
|
|||
Hangman was destroyed in the 22 February 2011 Christchurch earthquake. |
|||||||
| J | JJudgement, 20 | 20 | 16m |
|
|||
Judgement was destroyed in the 22 February 2011 Christchurch earthquake. ...according to the law of gravity. Go hard on the offensive or your defenses will be exposed for the shallow fabrications they really are. The crack 2m R of Hangman. Crux moving out from under the roof. Exit either straight up or R up Peregrinus. Solid and sustained. |
|||||||
| P | PPeregrinus, 22 | 22 | 16m |
|
|||
Peregrinus was destroyed in the 22 February 2011 Christchurch earthquake. Start as for Flying Buttress but climb the roof half-way across the undercling. The crux is just over the lip, where a semi-layback move leads to good holds. Continue up on the same line. Quite sustained. A small CD is useful on the overhang, and small wires for the crack. |
|||||||
| FB | FBFlying Buttress, 16 | 16 | 16m |
|
|||
Flying Buttress was destroyed in the 22 February 2011 Christchurch earthquake. A superlative route. Climb the slab (no pro), shove something big up under the roof (#4 cam, #11 hex), then take a deep breath and ccc-commit yourself to the R-wards undercling (crux). Once over in the crack, relax, then bridge and jam to the top. Sustained, but has several rests and good pro. |
|||||||


