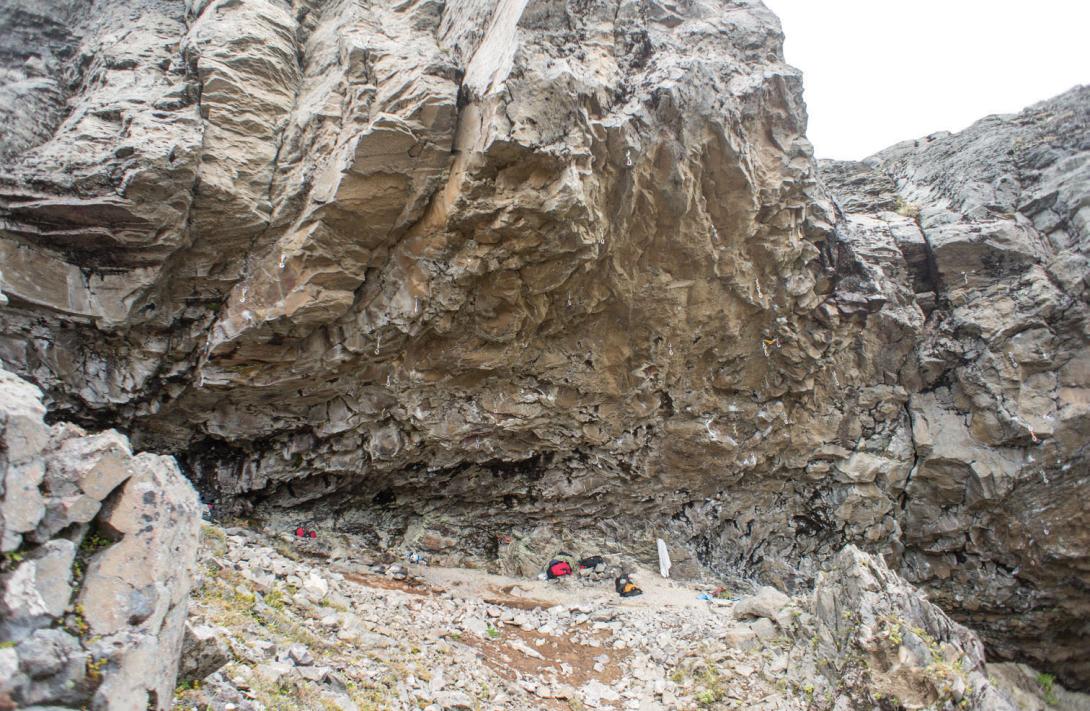
This is the shorter and more fused wall which you encounter first.
Routes
| Reference | Title | Grade | Length | Pro | Quality | Alert | Operations |
|---|---|---|---|---|---|---|---|
| 1 | 1The Spider, 25 | 25 | 10m | 5 |
|||
Starts from the monster double-hand undercling. Climb the immaculate line of holds coming out the horizontal arête using toe-hooks, compression and whatever other tricks you can come up with. One trick is to climb the crack above the bolts rather than the holds below, which makes it significantly easier and much less pleasant. |
|||||||
| 2 | 2Infinite Monkey Theorem, 27 | 27 | 12m | 6 |
|||
Now climb The Spider the way it was meant to be climbed. At the end of the horizontal arete, swing under the roof then muscle right on underclings to a huge jug at the base of the hanging slab. Climb up the corner to the single ring anchor (and back jump to clean). |
|||||||
| 3 | 3Mansard Roof, 29 | 29 | 15m | 9 |
|||
Start from the same point as The Spider but head right towards the hanging groove. Desperately strange moves lead you to the monster hanging tongue, The climbing from here is easier but of outstanding quality. Finish around the corner and up the headwall as per the next route. |
|||||||
| 4 | 4Crag Vultures, 30 | 30 | 15m | 7 |
|||
Start in the fractured rock in the back of the overhang. From some large jugs, a boulder problem on underclings leads to a monster rest and then some thuggy climbing through to the obvious jugs. Finish up the headwall (there is only one ring anchor as back-jumping to clean is mandatory). |
|||||||
| 5 | 5Them Crooked Vultures, 28 | 28 | 15m | 8 |
|||
Start as for Crag Vultures. From the monster rest, cut right to join the next route via some big pulls on great holds. Link-up climbing at its best. |
|||||||
| 6 | 6Immortal Technique, 32 | 32 | 10m | 7 |
|||
Starts up Coriolis Effect and then goes up and left through a very hard looking section of blank wall. |
|||||||
| 7 | 7The Coriolis Effect, 28 | 28 | 10m | 7 |
|||
Steep, athletic and quite sustained. A superb opening sequence leads to a move right to a vague rest. From here climb through steep and ever more blank terrain to the crux (which has two distinct methods), then up through the blocks to an anchor above. This route was bolted by Peter Allison using someone else’s bolts, it was then dogged by the masses and climbed without permission by James Field-Mitchell. Rumour has it that another climber reached the anchor before James, also without permission. |
|||||||
| 8 | 8Civil Unrest, 29 | 29 | 12m | 8 |
|||
Climbs as per The Coriolis Effect but after the crux it breaks back left along a rail of |
|||||||
| 9 | 9First Breath After A Coma, 29 | 29 | 12m | 8 |
|||
Probably the best line of this middle section of wall, the great steep climbing only let down by the perma-wet first hold. Start as per Krakatoa but instead of climbing straight up head up and left via a series of big moves to join and finish up Civil Unrest. |
|||||||
| 10 | 10Retaillack, 28 | 28 | 12m | 8 |
|||
The first line bolted on this section of wall, and nearly the last one to be climbed. start as for First Breath After A Coma, join and then finish up The Coriolis Effect. nobody, including Kristen, has any idea what the name means. |
|||||||
| 11 | 11Krakatoa, 25 | 25 | 10m | 6 |
|||
Start on the wet undercling and make a couple of long pulls to reach the large ‘meat wrap’ feature. From here there are a couple of tricky moves leading right and then up the groove. The top of the groove is quite often wet, but it is still possible to climb the route. |
|||||||
