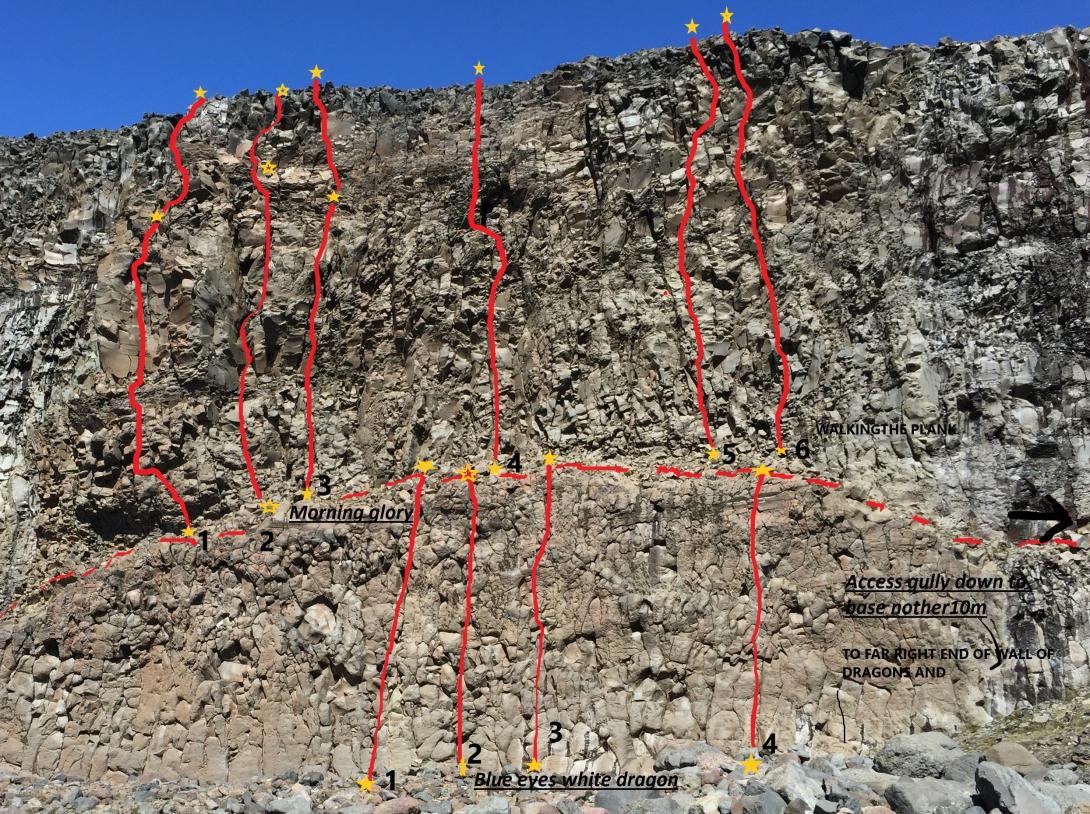
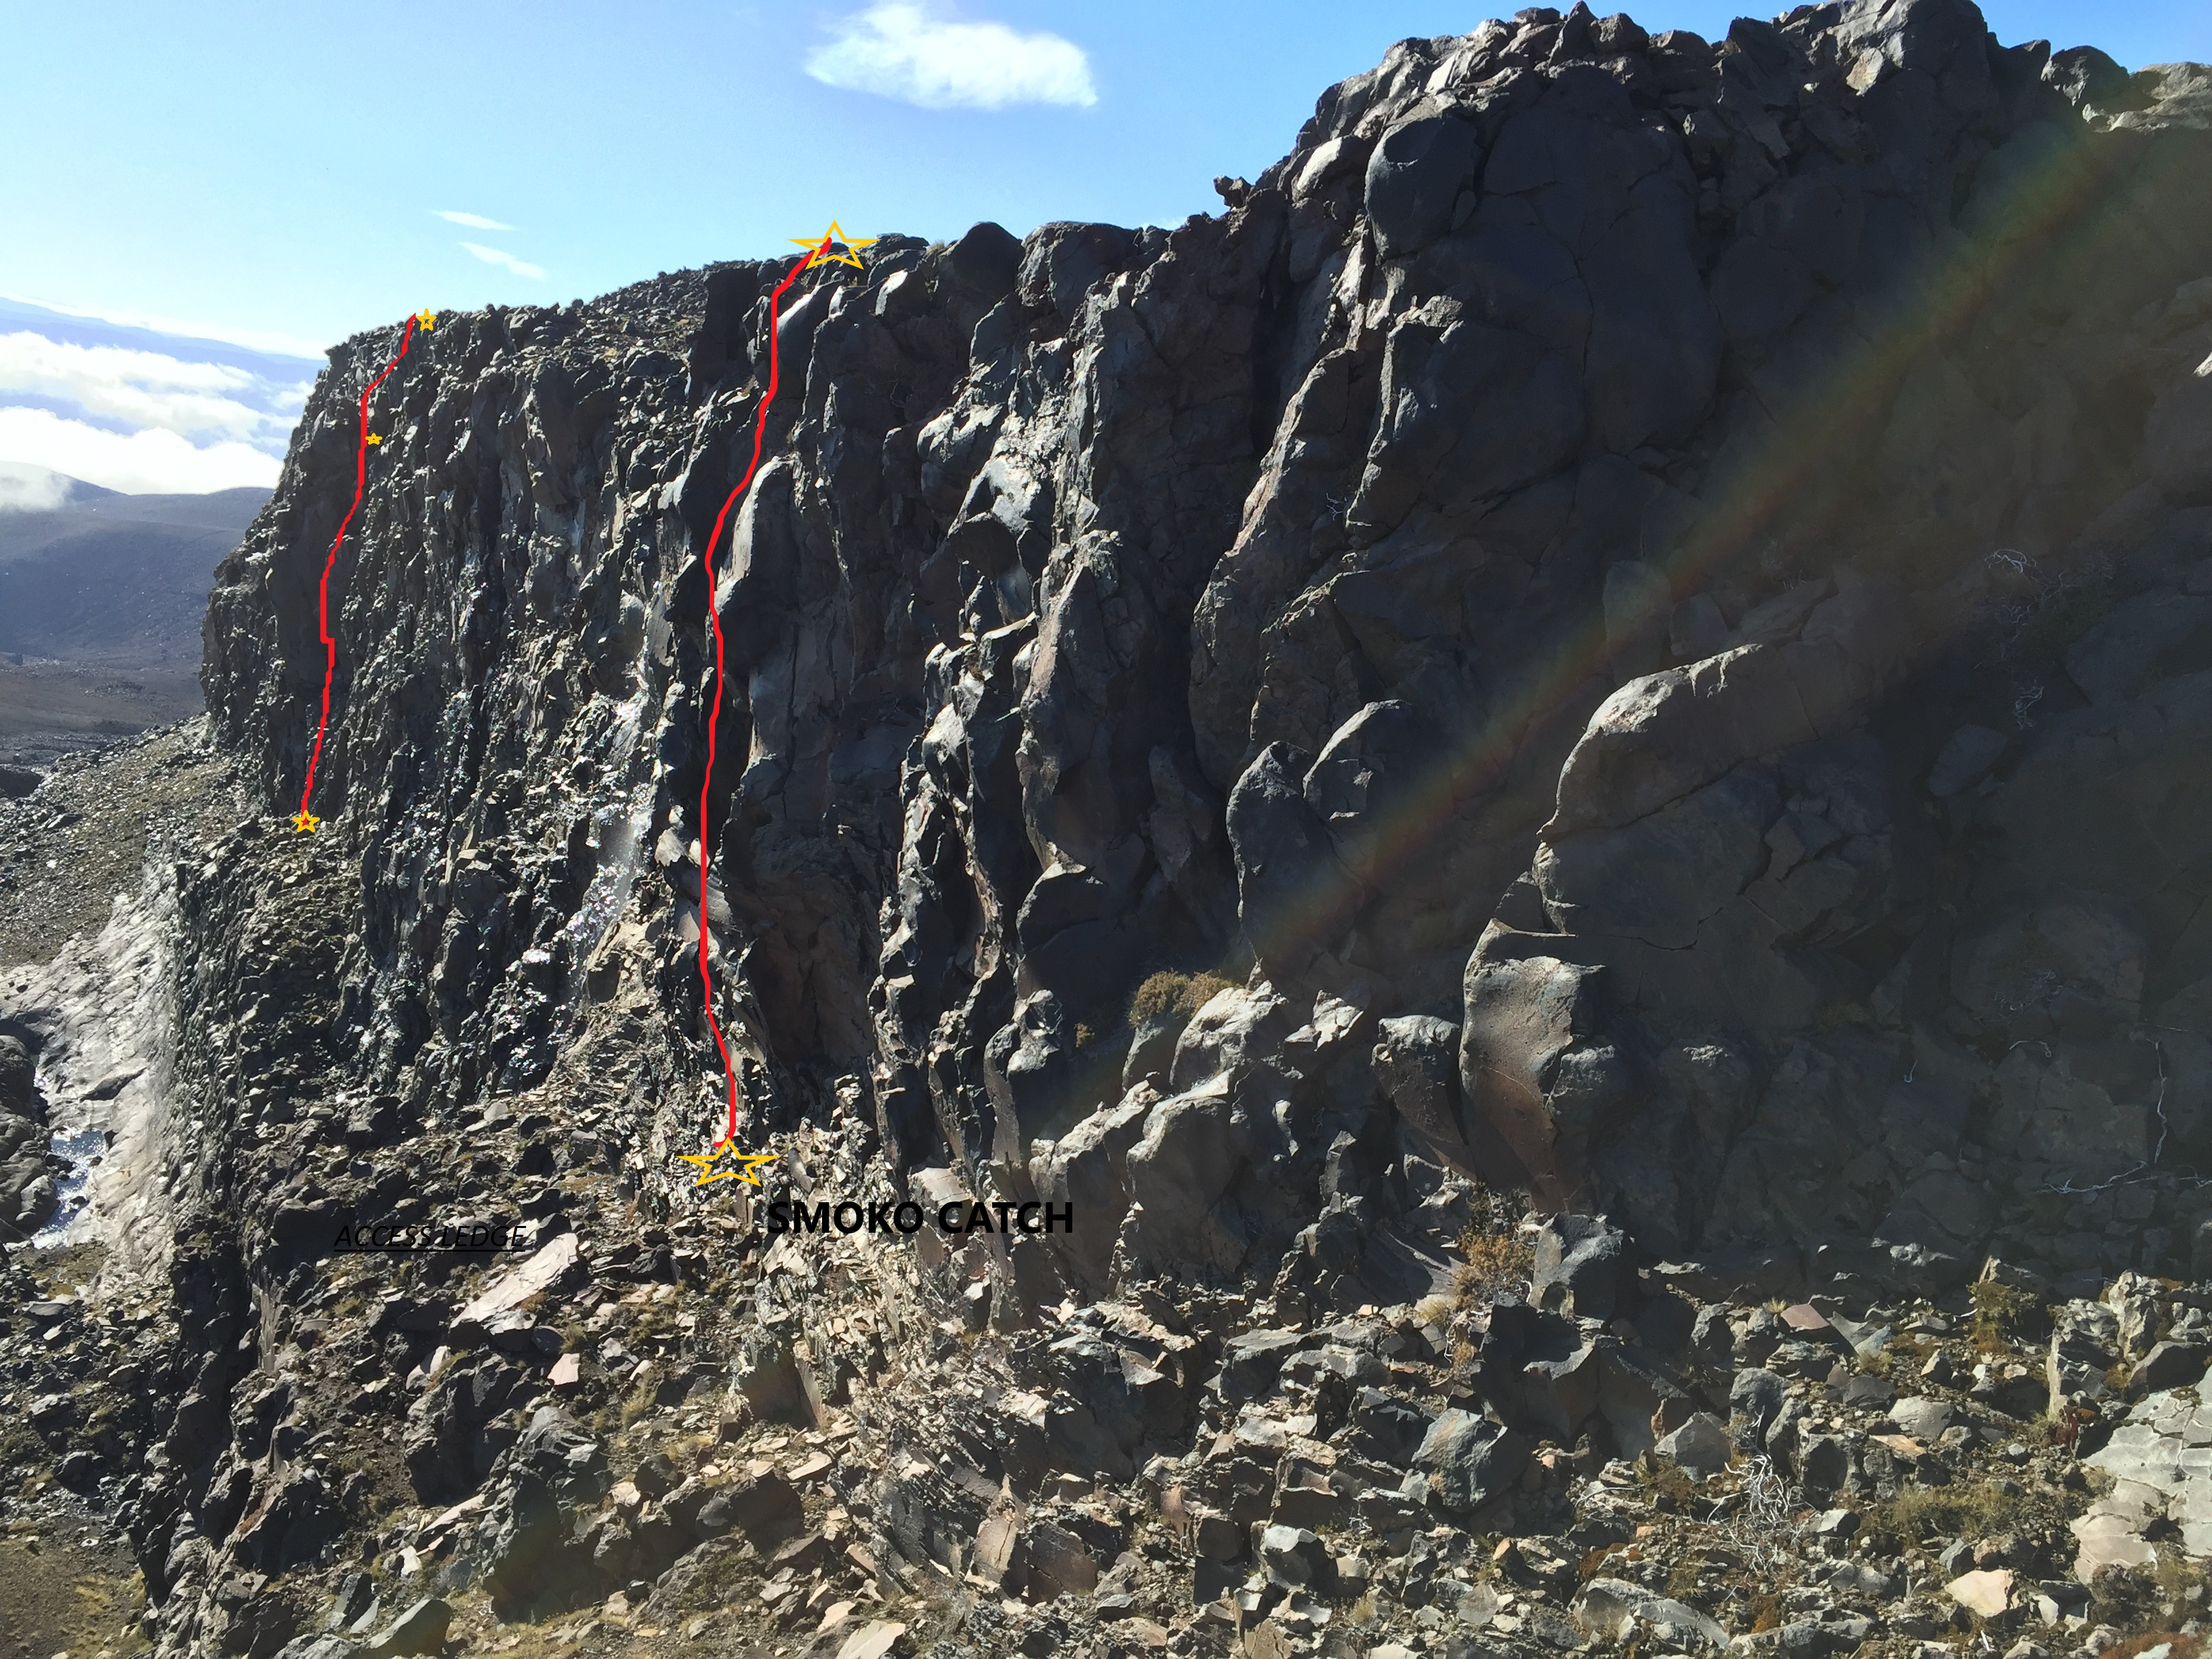
This is the upper tier cliff line in the Mangatoetoenui Gorge. It runs above the White Dragon Wall, broken by an access ledge running the entire base of the cliff and which runs up to a gradual access gully to the top, west end of the cliff. Rock is brittle and loose in places but very solid with good gear in the obvious lines of weaknesses.
As for the rest of the Mangatoetoenui Gorge either down in the head of the valley or the access gully west of the Rehab wall or 150m to east and down the access gully on to mid tier ledge system.
Both of these gully acess points have been marked with stone cairns.
Routes
| Reference | Title | Grade | Length | Pro | Quality | Alert | Operations |
|---|---|---|---|---|---|---|---|
| 1 | 1Afternoon Tea, 21 | 21 | 55m | ||||
|
Extra Beta: First Pitch: 35-40m, Grade 21, Protection Size: Camalots #0.5-2 Second Pitch: 15-20m, Grade 18, Protection Size: Camalots #0.25-2
Start 3-4m left of Morning Glory, angle left-ish up between bulges to a roof, step left then up (crux) through bulges and up onto ledge, head up big left corner crack and directly through roof to find belay on edge of central buttress
Drop into gully behind the buttress and directly up headwall just to the right of water line & belay off boulders a few meters back from top, alternatively scramble further up gully to join Morning Glory under the chock-stone |
|||||||
| 2 | 2Morning Glory, 18 | 18 | 60m | ||||
|
Pitch-1
This is the first climb to link through from the white dragon wall to the cliff top, climb done onsite.
Climb on to the chock stone. |
|||||||
| 3 | 3Tip toe into the dragons cave, 18 | 18 | 60m | ||||
Pitch-1 16 45m Start couple of metre right of morning Glory next obvious crack lines shows to cracks either side of a flat face this is just above a blocky stepped start follow right crack continue up around a flake up to a broken ledge belay just below the obvious head wall with a shallow corner crack
Pitch-2 18 15mget established in crack lay back the corner and gain a high ledge the crux then tend left to a free standing flake more solid than it looks move behind this then up to a couple of grunty moves to top out. |
|||||||
| 4 | 4Brunch, 17 | 17 | 45m | ||||
Start at the top of Blue eyes white dragon, head straight up the crack system towards a dark recess, when the crack thins out head out right onto steeper terrain then up into the recess, exiting to the left and up the final steep wall before an easy scramble to find an anchor boulder [SM cams + wires]. |
|||||||
| 5 | 5Descaling the dragon, 18 | 18 | 45m | ||||
|
This starts roughly 6m left of the top of the Deception anchors or left of walking the plank.
The climb follows a series of broken crack lines and wanders a little from ledge to ledge, once about 3/4 up around 35m there is a small head wall with two obvious cracks either side take the right move up and pull around flake and move up left side of the prominent top out head stones of walking the plank. |
|||||||
| 6 | 6Walking the Plank, 17 | 17 | 45m | ||||
|
This makes a splendid follow on pitch from deception on the lower tier.
This follows the obvious weakness of crack lines starting straight up in line from the climb Deception fairly consistant for its grade and has good gear on it follow the obvious line up to the over hanging flakes pull up and top out left side of the plank rock. |
|||||||
| 7 | 7Smoko Catch, 19 | 19 | 22m | ||||
|
This is nearer the descent route down from top this is more on the second buttress outcrop with two obvious crack lines and takes the left one when looking at the face.
Starts far right end of main face or just below the decent access route from top, follows the obvious left crack on that Buttress out crop. |
|||||||

