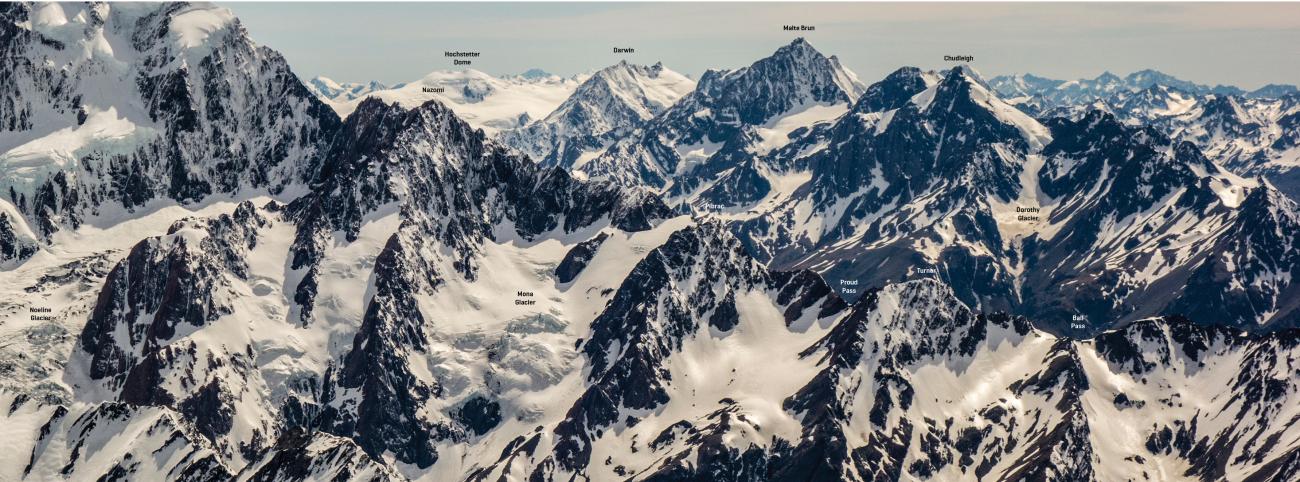
Map
Routes
| Reference | Title | Grade | Length | Pro | Quality | Alert | Operations |
|---|---|---|---|---|---|---|---|
| 3.119 | 3.119From Mona Glacier, II,2 | II,2 | 0m | ||||
|
From the Hooker Glacier ascend the Mona Glacier onto either the north face or north-east (divide) ridge, which both involve a short scramble up the summit block.
|
|||||||
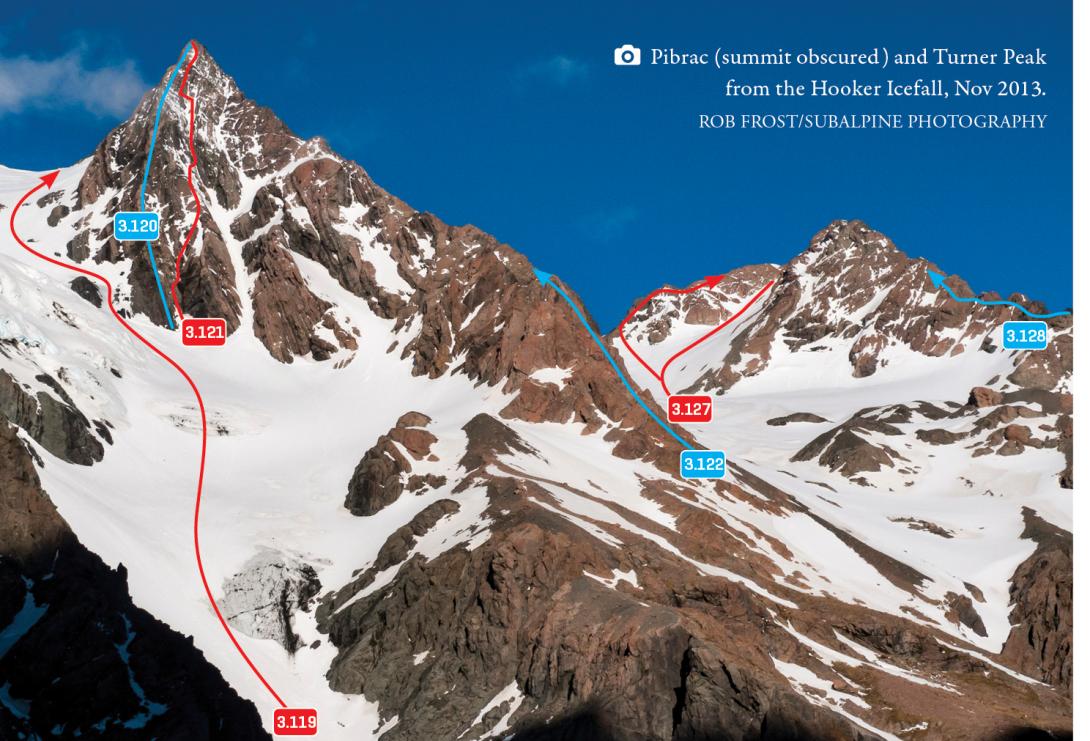
| 3.120 | 3.120North West Spur, III,4 | III,4 | 0m | ||||
|
Climbs good rock to two-thirds height, after which the rock quality deteriorates such that it’s ‘verging on a bit dangerous’. Tops out at the point where the West Ridge eases. Follow the West Ridge to the summit.
|
|||||||
| 3.121 | 3.121The Shaft (West Face), IV,6,WI3 | IV,6,WI3 | 0m | ||||
|
A 12 pitch climb involving some fun, but often poorly protected, mixed climbing. Climb the gully immediately right of the north-west spur, which involves some WI3 ice, then veer right as you gain height with some easy mixed climbing for a few pitches. The main snow gully was avoided on the first ascent due to soft conditions. Traverse across a thin mixed pitch to reach the base of ‘The Shaft’, which is an obvious 50m ice runnel above the main snow gully, capped by a vertical bulging chimney. This is the crux of the route. Above the ‘Shaft’, climb up then left to reach a final mixed gully, topping out where the West Ridge eases. Follow the West Ridge to the summit.
|
|||||||
| 3.122 | 3.122West Ridge, III,3 | III,3 | 0m | ||||
|
An eye-catching line. Access the base of the ridge from the Mona Glacier, then stay on the crest all the way to the summit. The rock is good lower down, but deteriorates towards the top.
|
|||||||
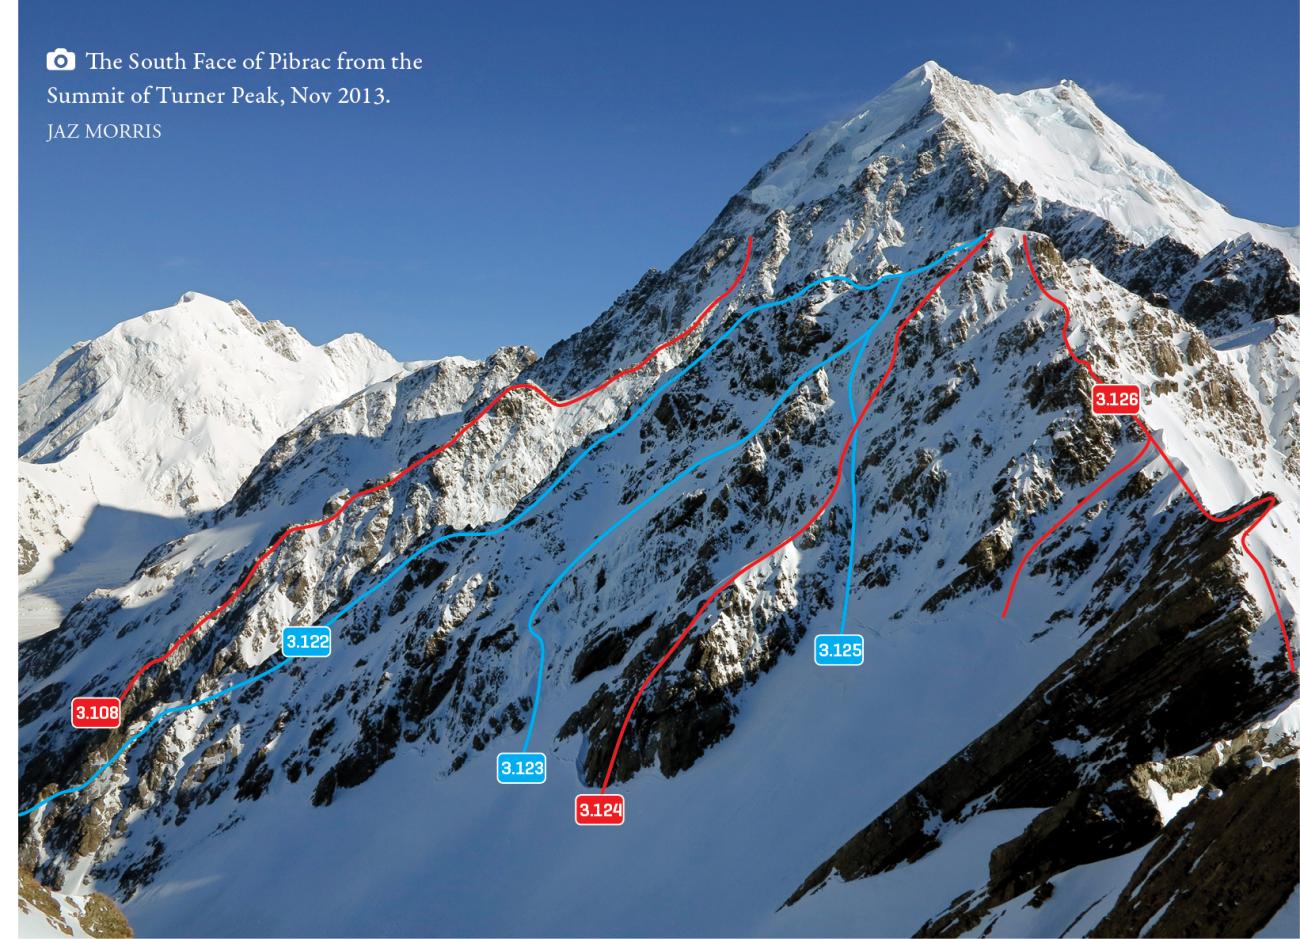
| 3.123 | 3.123Left Gully, II,3+ | II,3+ | 0m | ||||
|
The prominent gully on the left side of the south face. Climb a short section of 60 degree ice, then ascend the right-trending gully on moderately steep snow.
|
|||||||
| 3.124 | 3.124Central Rib, II,5,15,M4 | II,5,15,M4 | 0m | ||||
|
A mixed climb that begins up the middle of the prominent rib. Climb this until it flattens off and meets the central gully (JM Goes Tramping) then tend slightly right to gain the rib on the upper part of the face, which leads straight up to the summit.
|
|||||||
| 3.125 | 3.125JM Goes Tramping, II,4,WI2 | II,4,WI2 | 350m | ||||
|
The central ice gully which tops out high on the West Ridge.
|
|||||||
| 3.126 | 3.126South Ridge, II,2+ | II,2+ | 0m | ||||
|
Access Proud Pass either from the Mona Glacier (by skirting beneath the West Ridge), or over Turner Peak. From Proud Pass, an exposed scramble leads to the summit. The small peak between Proud Pass and the summit can be avoided if necessary, by sidling on the west side and then climbing a 40 degree gully.
|
|||||||
Images