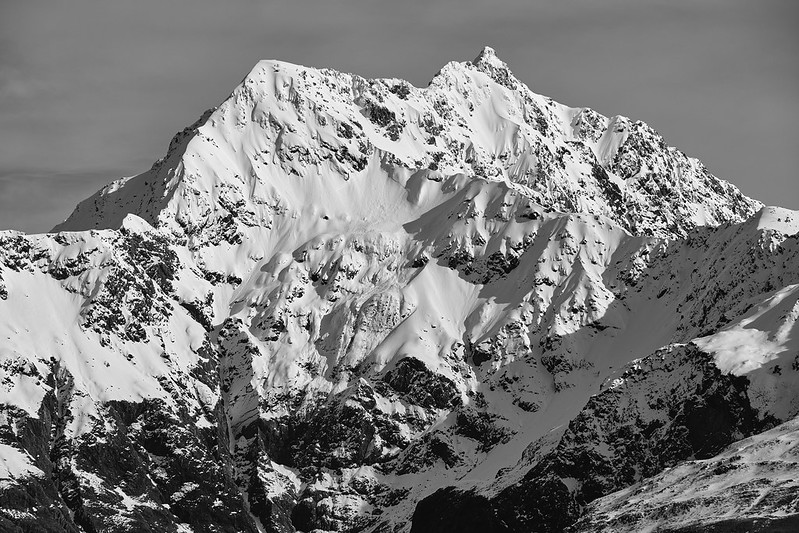
Mount Rolleston is significant both due to its profile, its ease of access and its varied climbing opportunities. It is one of the most sought after mountain summits in Arthur’s Pass National Park. As top all-round New Zealand climber Kester Brown once explained: ‘It’s right there! People can see it as they drive past. And yet, once you are climbing Rolleston, it feels like you are miles from anywhere.’
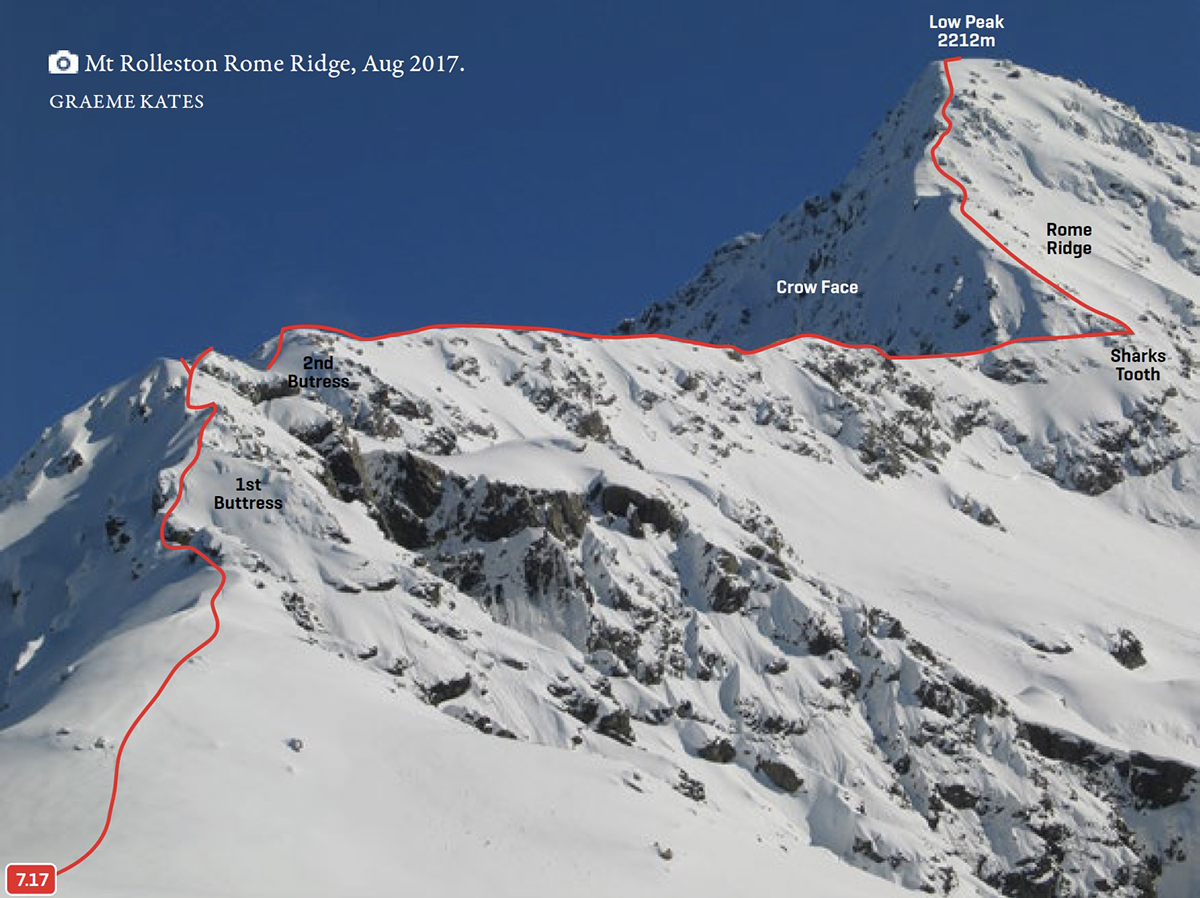
The closeness to a major roadway is certainly a factor in the mountain’s popularity. It is not particularly aesthetic to look at, more a bulky massif than classical in shape. But a number of its features are themselves enticing both to view and to climb. In winter and spring especially, the elegant Rome Ridge route is a flowing snow fluting that draws the eye gently upwards to the summit of the Low Peak.
Mount Rolleston was named after William Rolleston, the superintendent of Canterbury Province during the 1860s and 1970s. The name was given by Arthur Dobson and, while not particularly inspiring, at least the mountain isn’t named after some distant European gentry who never set foot in this country.
Arguably, Rome Ridge is the classic route of the park. Climbable in a long day car-to-car, and best when plastered in snow and ice, the ridge is an alluring line with a defined crux that still manages to turn around those who are not quite prepared or skilled enough. The climb entails just about every aspect of the typical Kiwi mountain experience, with a pleasant bush approach, exposed ridge climbing, some terrible rock (in late summer and autumn) and then a beautiful valley descent.
The ridge is usually and most easily approached by the Coral Track, 300 metres north of the McGraths Creek bridge. It takes about an hour to gain the tree line. Alternately, the ridge can be reached from the upper Bealey Valley, by way of an unappealing scree slog adjacent the lower Bealey bluffs. Access is also possible from the Crow Valley: Typically the Avalanche Peak tramping route is used to gain access to the ridge and East Crow Glacier by sidling the final gendarmes on the eastern slopes. In avalanche free conditions, it is possible to gain East Crow Glacier directly by climbing out of the Crow Valley head, utilising the narrow gut on the true left.
On the Coral track route above the tree line the lower ridge is easily climbed, though three prominent buttresses can be of some concern in soft or loose snow conditions. The first of these buttresses is climbed on its south-eastern flank (climber’s left) via gullies and rock steps. The second buttress is usually climbed via a wide scree/snow slope just off the ridge on climber’s right—this gully can be extremely avalanche prone in late winter/spring. An alternative is to drop down south and sidle under the ridge to join a col above East Crow Glacier, though avalanche and soft snow conditions can make this hazardous.
The last buttress on the ridge (Sharks Tooth) presents a steep down-climb into the notch known as the ‘Gap’, it can be avoided by dropping down the Avalanche Peak joining ridge southwards, then sidling across the East Crow Glacier to the Gap. In late summer a large bergschrund can cut access across the glacier to the Gap.
During summer, the Gap has a chockstone feature (the keyhole) that you can pass through onto the Bealey valley side. A steep, loose climb from here leads onto a very broken ridge, then up some loose gullies to gain the broader, more stable ridge above. In winter it may be possible to instead climb steep couloirs directly off the East Crow Glacier to gain the main arête (50m).
The first few pitches of the main ridge beyond the Gap are steep and loose if not covered in snow, with some exposure towards Goldney Glacier. About two-thirds of the way up the main arête is an area of stacked loose blocks that requires care in summer/autumn conditions. Once the Low Peak (2212m) is gained, access to the High Peak (2275m) is by continuing along the ridge on easier ground, via the Middle Peak. Middle Peak can be avoided by utilising Crow névé if it is negotiable. Note that late season the route from Low Peak to High Peak can become considerably more challenging due to the receding glacier conditions.
Descent should be made via the Otira Slide route. There can be a risk of avalanches here, especially in the afternoon as sun warms the north facing slope. Car to car, the trip generally takes a full day—a head torch and spare batteries are advisable!
Type of climbing: Snow/Ice/Rock
Duration: One Day
Season: Any time of year
Closest hut: Arthur’s Pass
Equipment: Two ice axes, crampons, rope, two snow stakes, ice screws, small rock rack
- P1
- Alpine (Commitment) II
- Alpine (Technical) 2+
- 1400m

